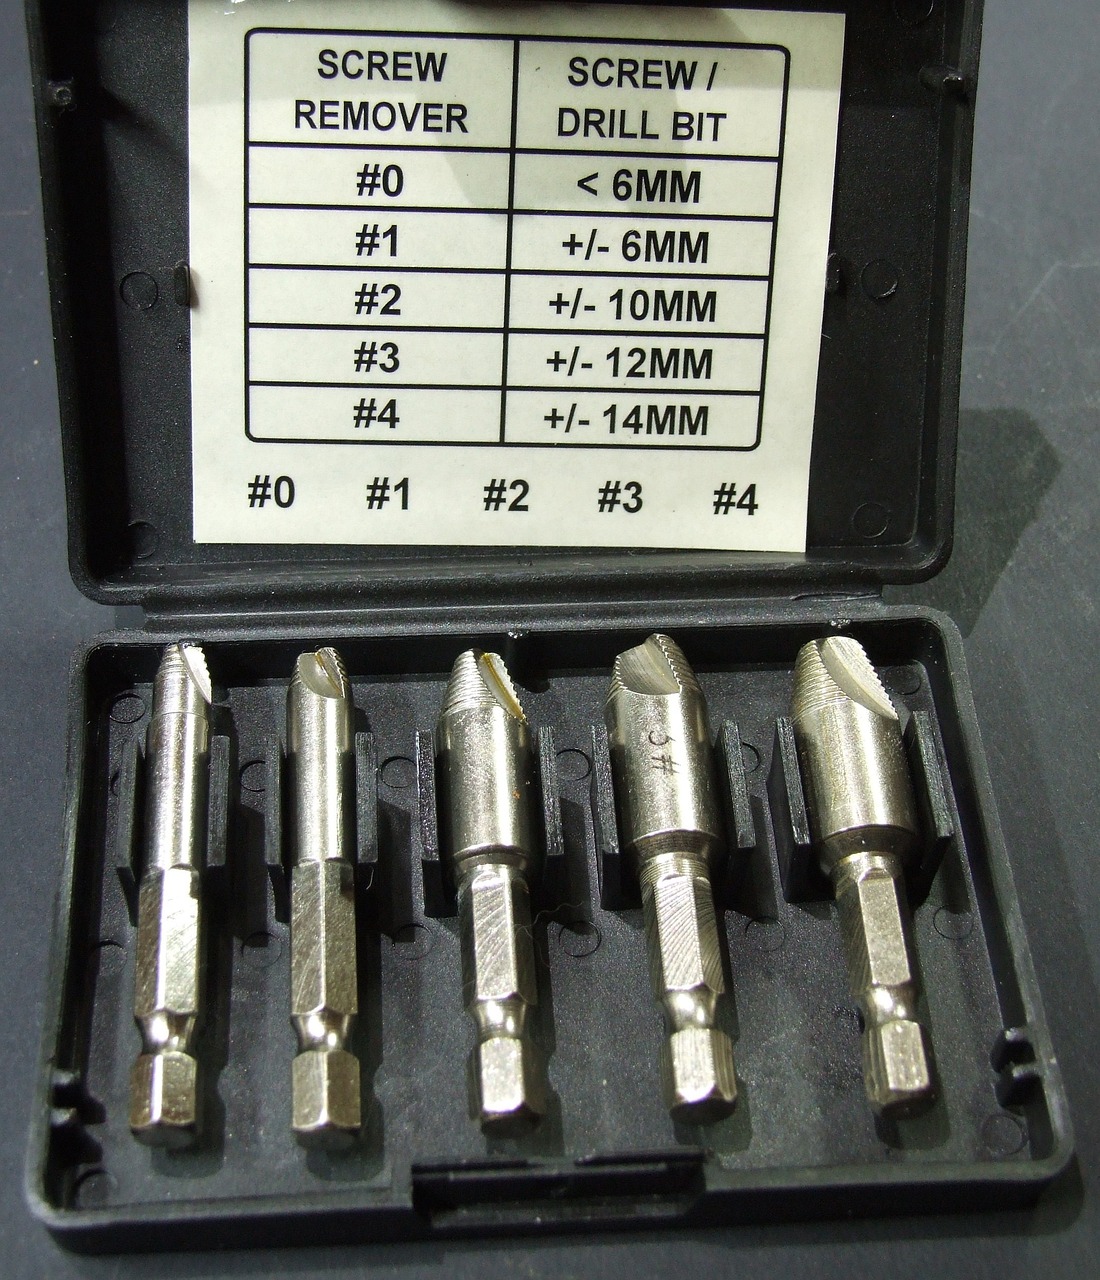
If the slots on the screw or the head of the bolt have been damaged by attempts to remove the fastener, it can be frustrating when removing a screw or bolt.
If the fastener is rusted or if the wrong-sized tool is used, this situation can easily occur. A slight mishap with the screwdriver or wrench can result in extensive damage or stripping of the screw or bolt head, making it nearly impossible to obtain a proper hold on it.
This clever little accessory, known as the screw extractor, comes to your rescue. It is available in different sizes to cater to screw diameters ranging from 3/32 inch to more than 1/2 inch. These screw extractors can be used on various types of screws and bolts.
The screw extractor is composed of a strong steel shaft with a square head at one end and tapered cutting screw threads at the opposite end. The T-handle is employed to rotate the extractor by fitting it with the square head. Alternatively, one can use locking pliers to grasp and turn the tool’s head.
At the end of the tool, there are tapered threads that are intended to be screwed counterclockwise into the head of the screw or bolt after drilling a pilot hole.
As the extractor is turned counterclockwise, the end becomes increasingly tapered, allowing it to dig deeper and tighter into the damaged screw. This allows the damaged screw to back out while the extractor continues to dig into it.
Why do you need a screw extractor?
It is sometimes acceptable to sever or bend a fastener without any issues.
In some situations, though, you just need to express it. When screws become rounded and stripped, they can significantly disrupt your efficiency, but they don’t necessarily have to completely stop your work. By keeping a screw extractor, which is reasonably priced, you can easily eliminate these bothersome worn and weathered fasteners with minimal frustration.
Having a set of screw extractors nearby is essential for anyone in the field of mechanics or woodworking. Whether you are a beginner or working under the guidance of a professional, we can teach you the techniques to effortlessly remove screws as if you have been doing it proficiently for a long time.
How a screw extractor removes damaged screws
The usefulness of the screw extractor comes from its general design. Although different brands may have slight variations, the most typical design incorporates a tapered drill bit with reverse threading. This particular design enables the screw extractor to effectively grip and eliminate damaged screws. It appears logical, doesn’t it?
To remove a broken screw, first punch or drill into its top, and then use a screw extractor to grip onto the screw and rotate it out of its previous position. This process is straightforward.
Instructions
Gather Some Needed Tools
Depending on the type and size of fastener, as well as the material from which you are trying to remove it, you will require a few tools.
- Screw extractor
- Hammer
- Center punch
- Drill (we do not recommend using an impact driver—too much torque and speed)
- Drill bits (not needed if your extractor has a boring end)
- Thread cutting oil and/or penetrating oil
- Wrench
- Safety glasses
Safety First
Make sure to put on safety glasses before starting your work, as there is a possibility of metal shards being expelled. It is important to safeguard your eyes from any debris that may arise. If you are worried about being harmed by metal shavings, wearing gloves might be advisable.
Drilling a Guide Hole
Firstly, locate a drill bit with a diameter that is smaller than the screw you want to extract. To simplify the task, apply a small amount of thread cutting oil to the screw’s head, as this will be advantageous. Ensuring that your drill bit remains straight, gradually drill downwards into the screw. It is likely that you will only need to drill down approximately 1/8″ to 1/4″ depending on the size of the screw extractor you intend to use.
If you are pausing to remove a screw, it is important to prioritize the protection of your workpiece. It would be detrimental to rush through the process and damage the entire piece. Additionally, it is advisable to use a drill instead of an impact driver as the latter’s mechanism does not provide a seamless action.
If you are using a burnishing/extractor double-ended bit, you will have to switch your drill to reverse in order to use it correctly. The advantage is that the double-ended bit already corresponds to the appropriate extractor size, eliminating the need for guesswork. Simply compare each bit to the screw and select the most suitable size.
Drill a Pilot Hole
To use a screw extractor to remove a screw, drill a pilot hole into the center of the damaged screw, using a power drill and a twist bit of appropriate size. If the head of the damaged screw is rough or uneven, it can help to start with a very small pilot hole, such as a 1/16-inch bit.
If you do not have a T-handle, you can use locking pliers to turn a screw extractor. A T-handle is an accessory that can be helpful when using a screw extractor. It gets its name from its shape and is designed to fit over the end of an extractor bit. T-handles are available in different sizes to accommodate various extractor sizes, and some types can also be used with taps for threading holes.
